First - Double Check Enrollment
Step 1 – Enter the patient's name in the search bar, then hit “Search”.
Step 2 – After making sure the patient is not in the system, click “New”. This will allow you to start the Enrollment.
Almost any field that is not a drop down will have the microphone  symbol and can have information entered verbally.
Overview
Here is a quick navigational video for Quick Enrollment.
Quick Enrollment - Part 1
1. Referral Agency/Site: This is a drop-down menu that allows you to choose who the Referral Agency/Site was for a patient.
2. Referral Source: This is a drop-down menu that allows you to choose who the Referral Source was for a patient.
3. Referral Type: This is a drop-down to note how they were referred.
4. Referral Status: A selection for the status of the referral
5. Referral Date: This allows you to choose the date of referral. Clicking on the date will open a calendar that can be adjusted to reflect any date needed, or click "Today" to populate today's date.
6. Referral Start Time: Record of when the Initial call started. Click "Now" for it to populate the current time or enter the time you want.
7. Intake Date and Time: Allowing you to input when the patient started services. These can also be manually entered or populate current date by clicking "Today" and current time by clicking "Now".
8. Program Indicator: This allows you to choose what program the patient belongs to.
9. Funding, Policy Number, Group Number: These 3 sections will allow you to enter payor/insurance information for the patient.
Quick Enrollment - Part 2
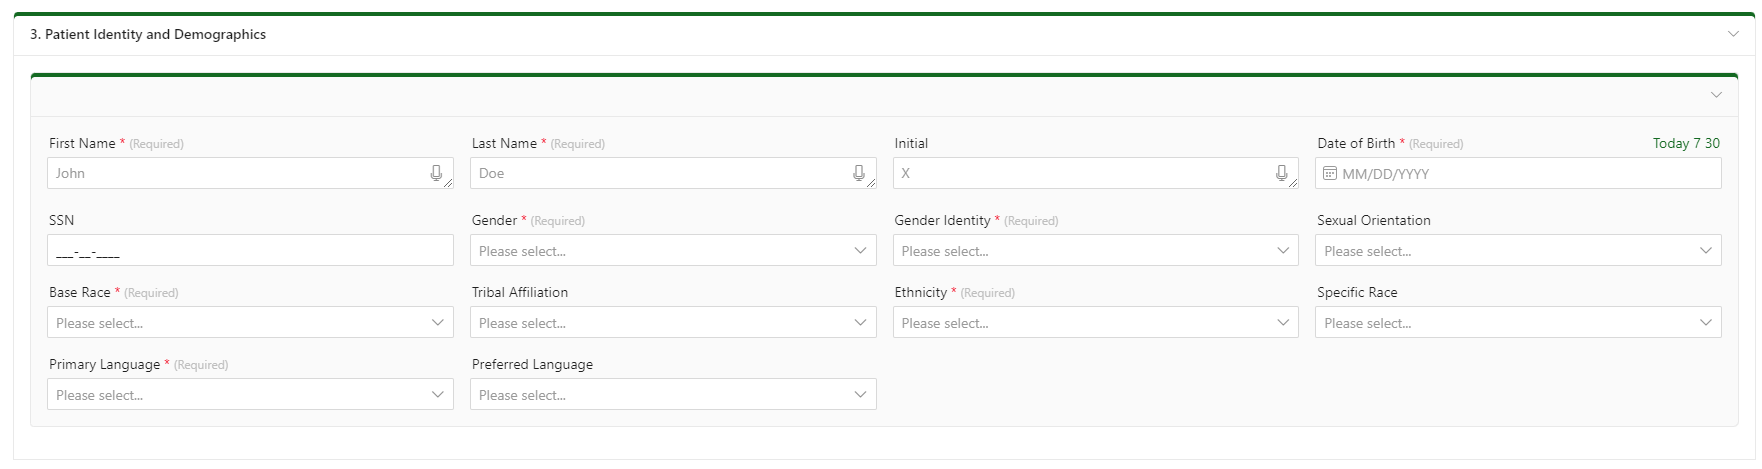
- In this section, we will be entering patient information. First name, Last name, DOB, Gender, Gender Identity, Base Race, Ethnicity, and Primary Language will all be required.
The information entered in this section will transfer over to the coversheet and can be edited later on from there.
Quick Enrollment - Part 3
1. Address/Contact Input: This section allows you to input the appropriate residence information that should be associated with the patient. Address, Zip code, City, Preferred contact, Phone Numbers, Email, and some contact options.
2. Medicaid ID/ Health Plan: This section will allow you to input Medicaid ID information and select the health plan associated with the patient.
3. Submit/Reset: Reset will remove all the entered fields. Submit will save and add the patient to Axiom.
The information entered in this section will transfer over to the coversheet and can be edited later on from there, Aside from the Health plan and the rate code.
CONFIDENTIAL AND PROPRIETARY INFORMATION - NOT FOR DISTRIBUTION Copyright © 2024 Health Information Management Systems, LLC